Tuesday, May 29, 2012
Thursday, May 3, 2012
Stabiliser, Elevator Rudder and more.
For some reason I didn't take any photographs for the period 3 - 17 May. During that time I put together and deburred the Horizontal stabiliser, Elevator and my rudder skin arrived from Zenith.
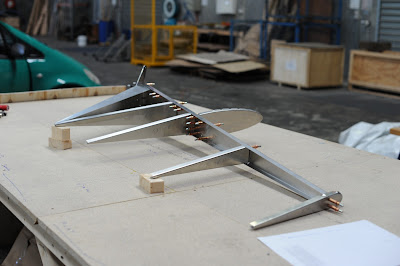
Here is my rudder in all its glory.
After finishing the rudder it was disassembled and deburred along with the Stabiliser and elevator.
On 24 May I alodined and started painting. The Sherwin Williams part number for the paint is CM04830928 Lot MQ0661 Mfg: 3/7/11. The hardener is CM0120828. Reducer is CM0110933.
Thursday, April 26, 2012
Flaperons
I started assembling the flaperon skeletons and making the hinge brackets. When I finished them I put them aside.
Tuesday, April 24, 2012
Slats
I started on a slat today and worked on the ribs. I can't finish the rudder until a new skin arrives from Zenith.
Rivets, Paint and Goo
POP RIVETS:
The Zenith air over oil air riveter is just magic. Why anyone would want to build an aircraft without using avdex rivets is beyond me. It's such an easy system to use and produce a quality result.
SOLID RIVETS:
I had thought about using solid rivets in various places on the kit, mainly for aesthetic reasons - they look better. Caleb at Zenith pointed out that all the joints (with a few exceptions) are designed for avdex rivets, which are not as strong in shear as solids. The outcome of that is the joints won't be any stronger if I use solid rivets.
However one of the philosophies I've been stuck with since first working on cars and boats is that I like to make structure so strong that I don't ever have to worry about it again - I can therefore save my nervous energy for more productive pursuits than worrying if my Boat mast is about to fall down or a wing fall off.
For that reason I bought rivets MS2047DAD4 and 5 in a variety of lengths from Aircraft Spruce and also Aviaquip. Cleveland tool makes a nice little rivet gauge.
I bought a plain cheap rivet squeezer from Aircraft Spruce and a set of dies.
Initial tests demonstrated the following:
(1) It's hard work squeezing rivets all day by hand for anything more than 3/32.
(2) The design of solid riveted joints is different to pop riveted joints. When I tried to achieve the recommended formed head sizes on the rivet by following the specs, I invariably ended up with a mess. The reason is that in joining two .025 bits of aluminium, 1/8 and 5/32 solid rivets would never be used because the metal is just too thin, so the specs don't really apply until you have thicker material because you are "out of range". The solution to that is to either go back to avdex rivets or drop the 1.5 X Diameter length requirement for the unformed head. That produces a properly formed head although not quite as large as Mil -Spec would want, but still way stronger than an avdex rivet.
PAINT:
Being a former Airline engineering person (but not hands on), I was educated in Boeings approach to corrosion control - alodine, two part epoxy chromated undercoat and polysulphide rubber goo to seal out water from between joints.
Since aircraft primer cannot travel by airfreight I can't buy it from Aircraft Spruce - so you guessed it - its expensive and difficult to come by. PPG is a waste of time.
I eventually found the Sherwin Williams brand, handled by Aviation Surface coatings managed by the beautiful, practical and knowledgeable Clare. She sold me a gallon of Two part Strontium Chromate Epoxy Primer that goes over Alodine. Later I moved to a Sherwin Williams primer system which uses a first coat of a wash primer, since Alodine is not environmentally friendly to anyone and I ain't going to splash it around over large chunks of aircraft skin wearing rubber gloves - or my skin for that matter.
GOO:
Polysulphide rubber sealants are impervious to any known fuel or chemical. The standard used to be PRC1422 G 8 when I was in an airline. Now its 3M AC240-B-2. Yes its still looks like brown ****. It sticks like Brown **** to anything, including you.
However the resulting cured rubber is about like a car tire. I use it to keep dissimilar metals apart, seal out water, emergency back up thread locker and as adhesive - just a dab on a wire for example will stick it to the skin almost as well as a clamp.
An example of solid rivets, paint and goo on the rudder frame final assembly:
Monday, April 23, 2012
Everything went together perfectly just like the homehelp video said.
By this time I had acquired a Sioux and a right angle air drill from Aircraft Spruce, as well as a few clecos and number drills. This stuff is hard to come by in Melbourne, Australia, so most of my tools have come from Aircraft Spruce, Cleveland Tool and Brown Tool in Texas. Lets face it guys, you can never have too many tools :)
I finished the rudder skeleton on April 23 and since I was waiting for a new rudder skin to arrive from Zenith, I started on the slats...
Thursday, April 12, 2012
I have been meaning to put up this blog for some time, for bragging rights and hopefully as an aid for other builders, but also to document the build for the SAAA - the sporting aircraft association of Australia. The aircraft will be registered in the experimental category - if I succeed in finishing it.
On Thursday 12th April 2012, the kit arrived at "the fish cave" - a secret location deep in the bowels of a giant freight forwarding warehouse that is secure and private location for the build where I leased a little space from the friend who runs it.
The box was almost undamaged despite the usual rough handling by forklift drivers we lost a rudder skin. The kit is beautifully packed by Zenith with every sheet metal part carefully wrapped in miles of brown paper.
The bottom skid on the box had failed and the side joint had split. The rudder skin had slid into the gap and found a couple of nails....
I built a worktable and some shelves.
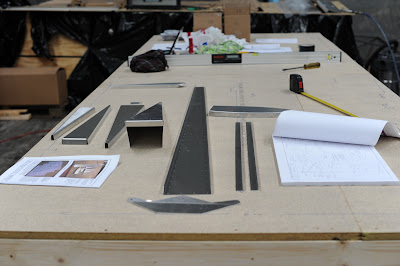
On 20 April at 12.03 am I said a silent prayer to the Gods, I found the parts of the rudder frame and began to learn about aircraft sheet metal.
Subscribe to:
Comments (Atom)


